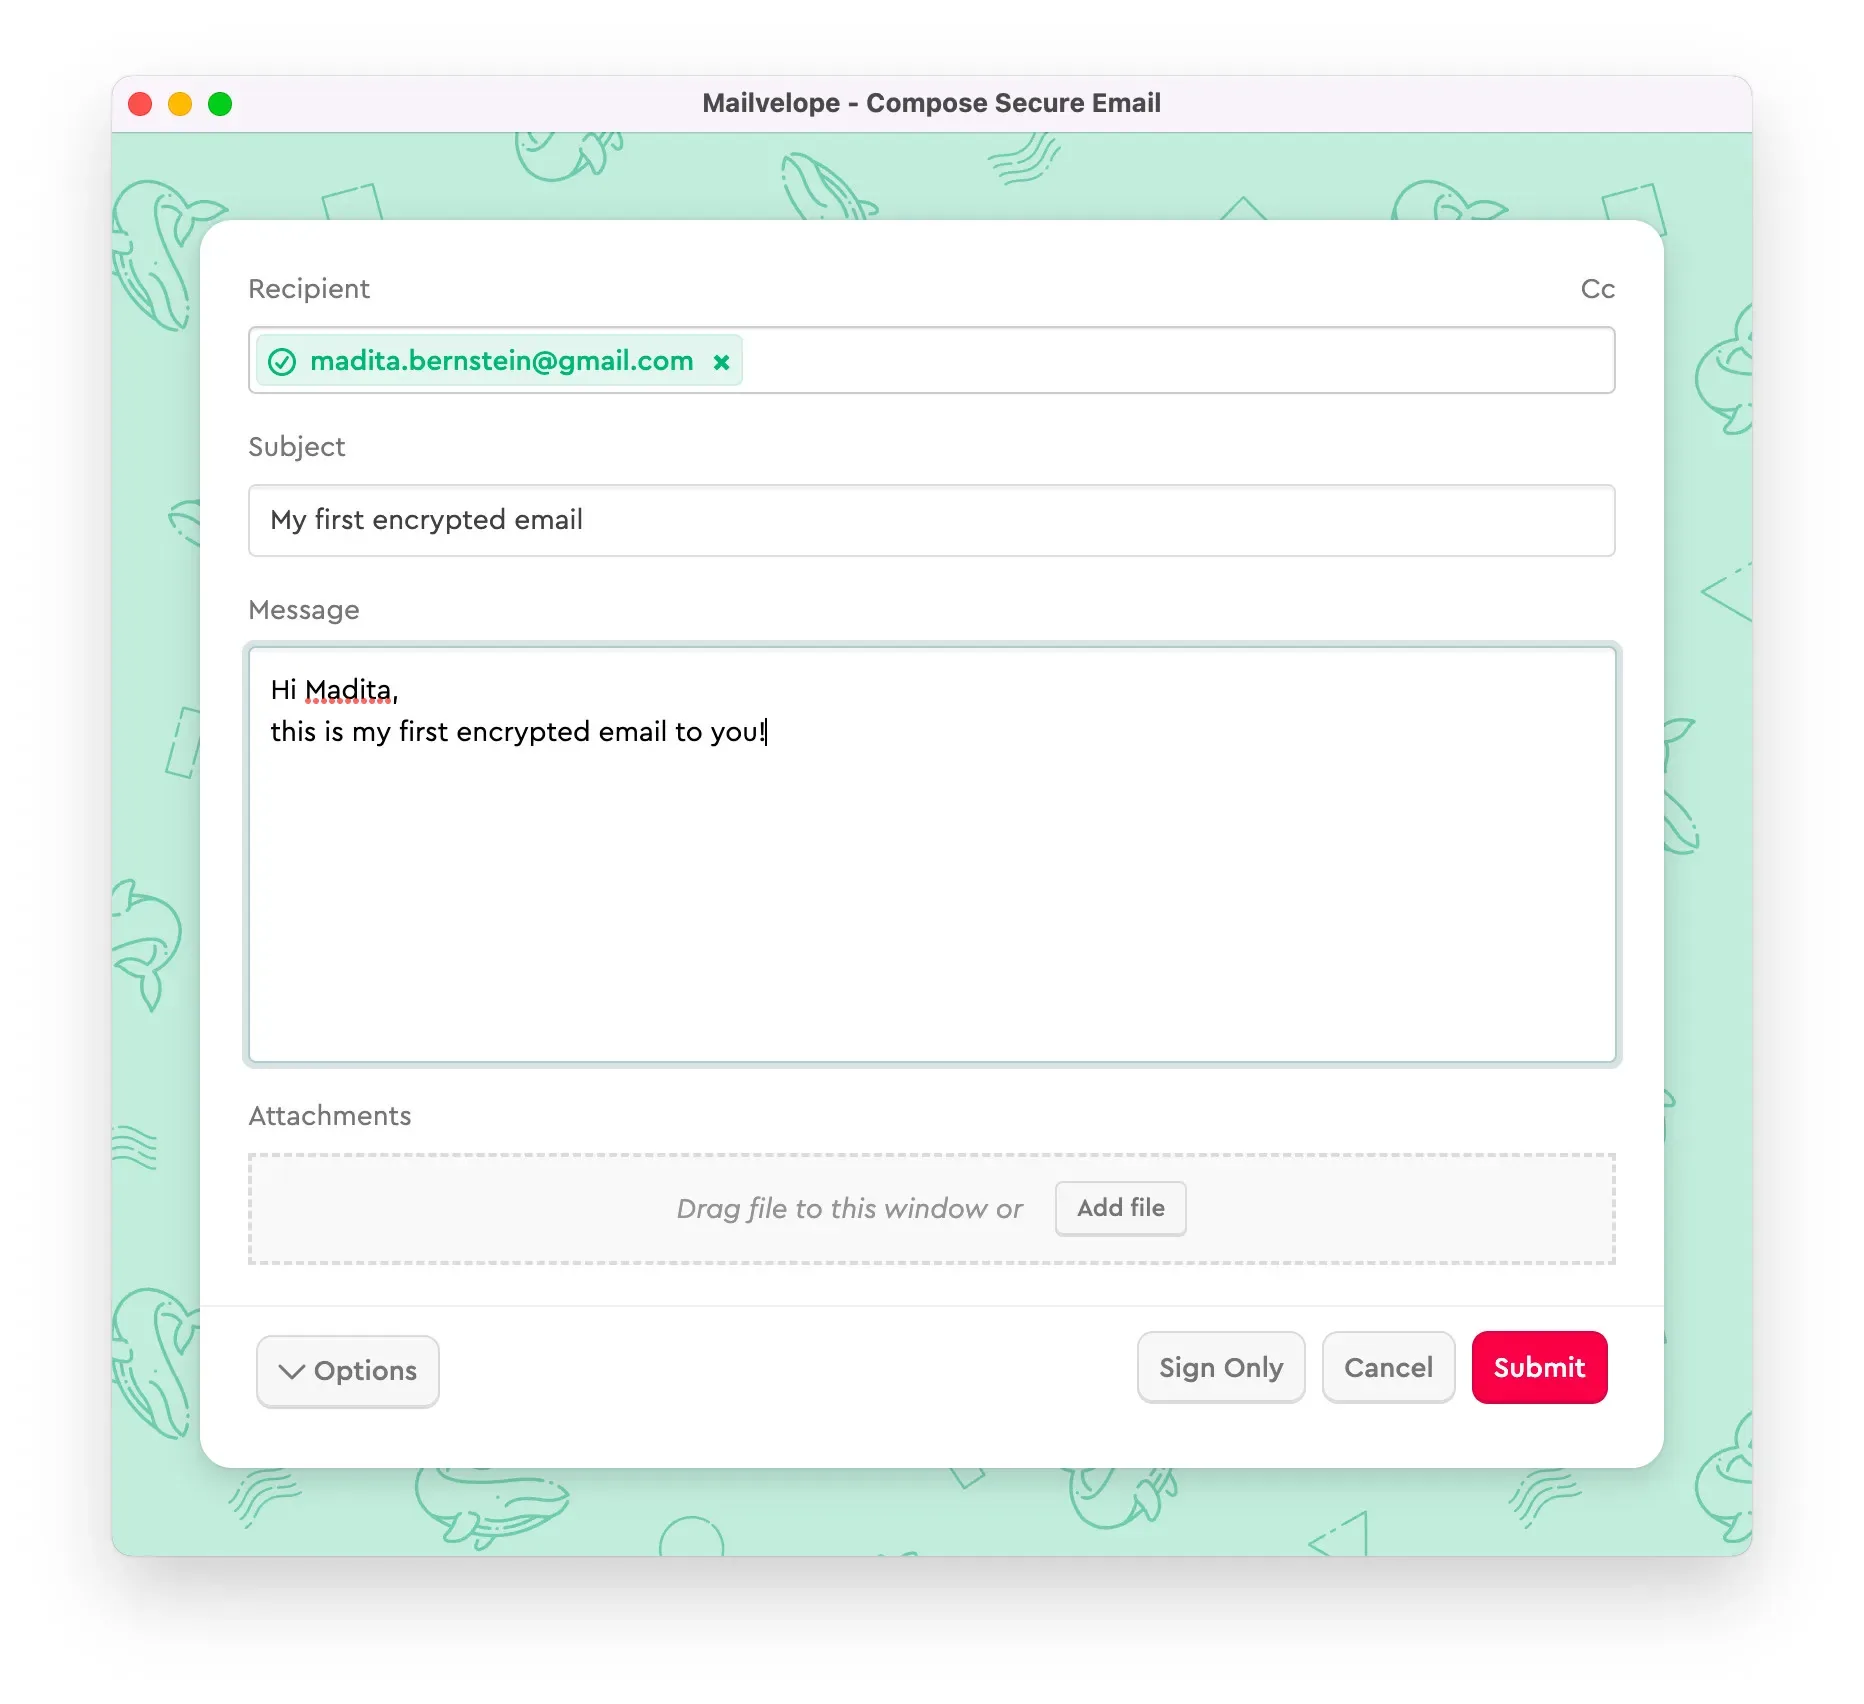
How to install Mailvelope Business for Workspace

Mailvelope Business is designed to provide seamless, enterprise-grade encryption for organizations using Google Workspace, whether you’re safeguarding sensitive communications or securing file transfers.

Illustration Mailvelope is integrated into the webmail UI

1. Install Mailvelope on your browser

Your first step is to add Mailvelope to your browser, using one of these download links:

Mailvelope needs to integrate deeply with your browser to function effectively. On installing the extension, your browser will prompt you to grant read/write permissions to Mailvelope. These permissions allow Mailvelope to add its features to your Google Workspace. Follow the prompts in your browser to complete the installation and grant the necessary permissions.

2. Open Mailvelope

The Mailvelope icon is located in the top-right corner of your browser. Simply click on it to begin setting up your encryption keys.

3. Add your keypair

To send and receive encrypted messages, you’ll need a PGP key pair. The Mailvelope setup screen will guide you through generating a new key pair or importing an existing one.

Mailvelope setup screen

Select Generate key on setup screen. Enter your name (or a pseudonym) and the webmail address you want to associate with your new key. Next, create a strong, unique password or passphrase. Be sure to write it down on paper or save it securely in a password manager.

Note: Mailvelope does not store your password, so if you lose it, it cannot be recovered by us.Mailvelope Input Screen for generating a new key

Once your key is successfully created, Mailvelope will confirm the process and display your new key on the Key Management screen.

Mailvelope generated a new key

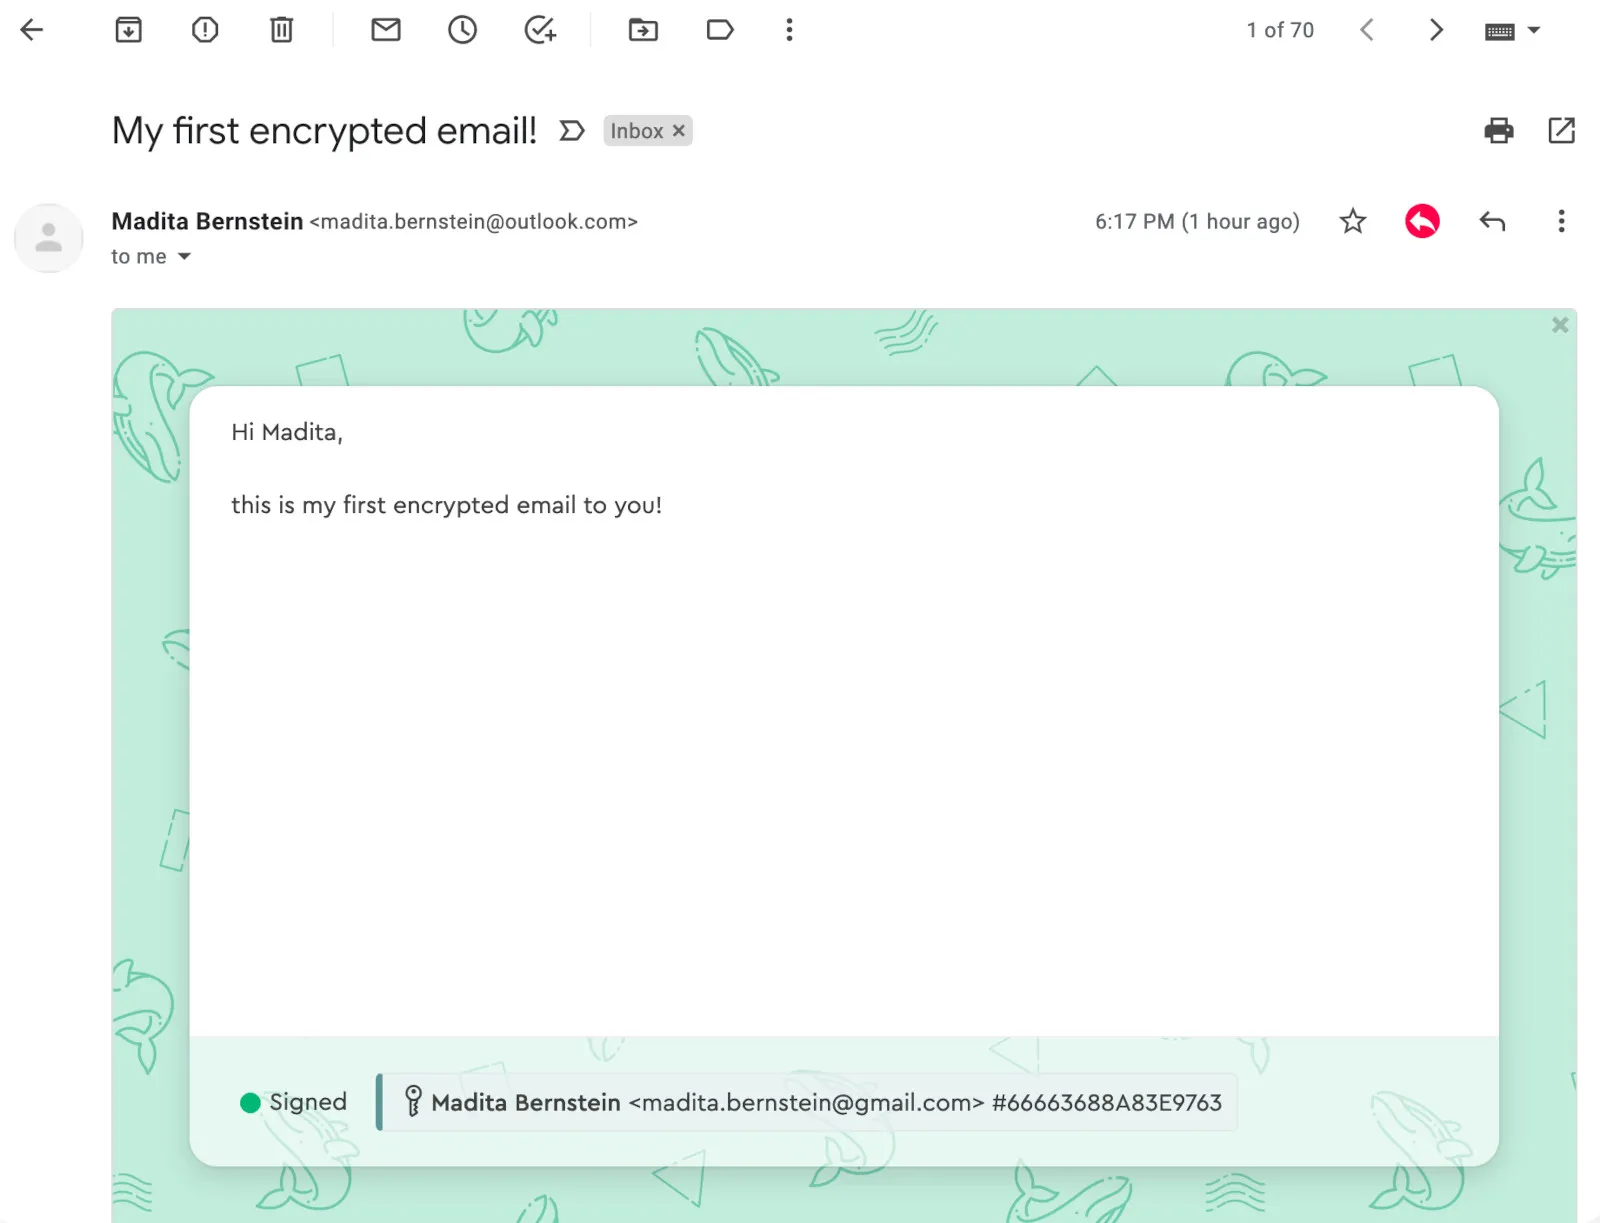
To ensure your communication partners can find your newly created key, it will be automatically uploaded to the Mailvelope Key Server unless you unchecked the option Upload public key to Mailvelope Key Server during key creation. Shortly after key creation, you’ll therefore receive an encryptedemail with the subject line “Verify your email address.” Open the email in the inbox of your Google Workspace Email account (not on another device, since the message is encrypted). Now enter the password you created during key generation in order to decrypt the email. Once you can see the message in cleartext, click on the verification link provided in the email. Your public key will now be available on the Mailvelope Key Server, making it discoverable by other Mailvelope users, whether within your organization or externally.

Note: If you should encounter any difficulty to open the email from Mailvelope Key Server, see step 4 of this tutorial, section: Decrypt an email sent to you.

Select Import Keys on the setup screen. You’ll need the keypair file (usually a file with an .asc extension). Import the key by either dragging and dropping the file into the browser window or selecting it manually using the Add File option.

Import key into Mailvelope

When you click the Import Keys button, Mailvelope will display the key’s technical details, including the Key ID and Fingerprint, for your review. After you confirm, the key will be successfully added to your keyring and is ready for use.

Sucess. Mailvelope imported a key i

To ensure the new keypair is available to other Mailvelope users who may want to send you encrypted emails, we recommend uploading it to the Mailvelope Key Server. To do this, open Key Management and click on your newly imported keypair. On the key details page (just click on the key in the keychain), you will see a red notification saying, The user ID is not synchronized with the Mailvelope Key Server. Simply click the Synchronize button to upload your public key. Next, check your email inbox for a message titled Verify your email address from the Mailvelope Key Server. Since this email is encrypted, make sure to open it using your webmail provider with Mailvelope enabled. Decrypt the email by entering your key’s password, then click the confirmation link inside. Once verified, your key will be available on the Mailvelope Key Server, making it easy for other users to send you encrypted messages.

Note: If you should encounter any difficulty to open the email, head on to Step 4 of this tutorial, section: Decrypt an email sent to you.

4. Encrypting and decrypting an email with Mailvelope

Sending an encrypted message

When Mailvelope is installed in your browser, a Mailvelope button will appear next to the Compose button in Gmail. Click this button to open the Mailvelope Editor.

Compose new email in Gmail

If you’re using Mailvelope for Gmail for the first time, you will need to confirm a Google security alert titled Using the Gmail API. The alert will make sure you grant Mailvelope access to your Google Workspace account in order to enable the deep integration required for encryption and decryption.

If you do not have an active Mailvelope Business subscription, you also may need to activate a Mailvelope Business 14-day trial now. Just follow the instructions on the screen. When asked for the domain name, make sure you type in the name of the domain used by your Google Workspace.

If you have more than one domain, please contact our support team under support@mailvelope.com to help you get started with a multiple domain setup.

Once back in the Mailvelope editor, type the recipient's email address into the recipient field. If your recipient has uploaded their key to the Mailvelope key server, Mailvelope will find it automatically and the email address will turn green, as shown below.

If the address stays red, that means that Mailvelope cannot find their key in the server. You can import their key to your keyring by following the instructions in step 5. Add others' keys

Create new email in Nextcloud Mail

You can now write your email as usual, add attachments (they will get encrypted as well) and send it by clicking on Submit.

Note: do not put confidential information in the Subject line. Mailvelope only encrypts the email message and eventually added attachments!

Decrypting an email sent to you

If you click on an encrypted email in your Inbox, Mailvelope will show it to you as a sealed letter. Clicking on it will open a password screen. Typing the password attached to your key will decrypt and open the message.

Decrypting a message in Nextcloud Mail

Note that Mailvelope added a red arrow for your encrypted reply. Clicking on it will open the Mailvelope Editor, and you are ready to type in your reply message.

5. Add others' keys (optional)

If your recipients do not use Mailvelope, their public keys will not be found by the Mailvelope editor automatically, when you type their email address into the To field. In this case you'll need to add the recipients’ public keys to your keyring first. There are two ways to do this.

Key servers are directories that store public keys along with their associated email addresses, making it easy to find your contacts’ keys by searching for their email addresses. To search for a key, navigate to Key Management → Search. Mailvelope’s built-in search function queries its own key server as well as several other commonly used key servers. If needed, you can customize the key servers included in the search to suit your preferences.

Mailvelope key search on different directories

If your contact has sent you their public key as a file (typically with a “.asc” extension), you can easily add it to your keyring. Simply go to Key Management and select Import. You can upload the file by either dragging and dropping it into the browser window or selecting it manually using the “Add File” option.

Import key into Mailvelope

6. Backup your keys

We strongly recommend backing up your keys and storing them in a secure location. If you reinstall Mailvelope or need to reset your browser or operating system, you’ll have to reimport your keychain, as Mailvelope stores keys only locally. For step-by-step backup instructions, refer to this FAQ, section: Backup of the complete keyring.

Note: Keep in mind that even if you back up your private key, it will be useless without the password associated with it. Make sure to also store your password securely.

Backup your keyring