Pour que Mailvelope fonctionne avec Roundcube, vous devez d'abord ajouter manuellement le domaine de votre service de courriel Web à la liste des domaines autorisés.Accédez à votre boîte de réception Roundcube et cliquez sur l'icône Mailvelope située dans le coin supérieur droit de votre navigateur pour ouvrir le menu principal. Cliquez sur Autoriser ce domaine dans le menu.
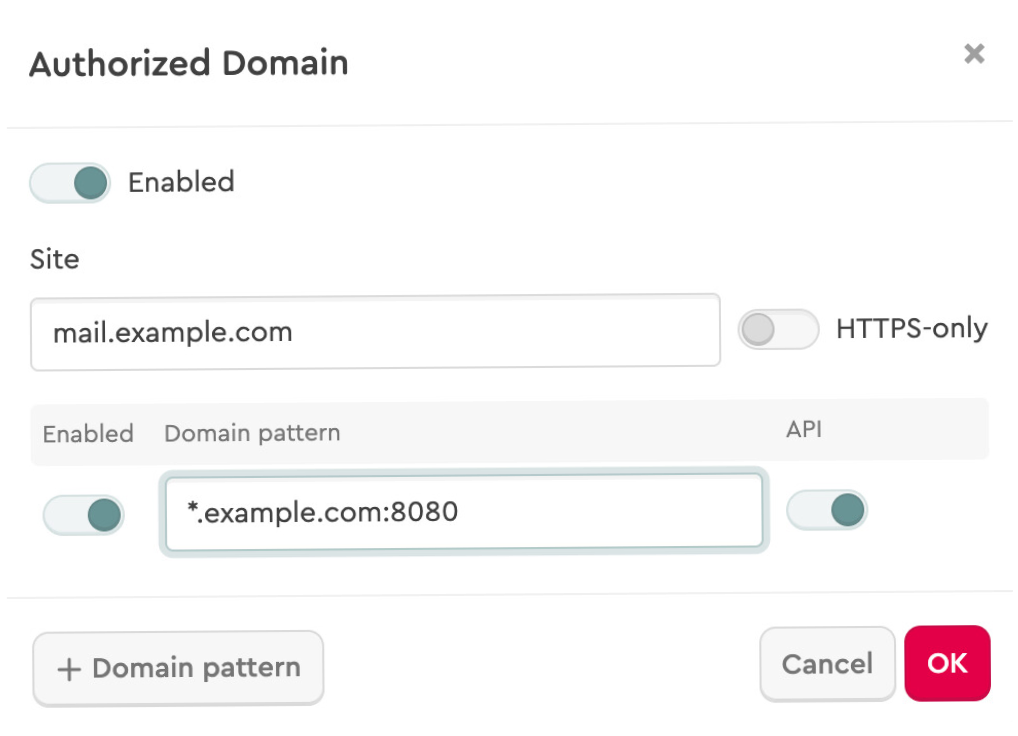
Dans la boîte d'ajout d'un nouveau domaine de Mailvelope, vous pouvez laisser les champs État et Modèle de domaine inchangés, sauf si l'URL comprend un numéro de port. Un numéro de port apparaît dans la barre d'adresse du navigateur aprèsdeux points (:), suivi de 2 à 5 chiffres (p. ex. https://courriel.exemple.com:8080). Si un numéro de port est présent, ajoutez manuellement les deux points et le numéro de port au champ Modèle de domaine,
après le domaine détecté automatiquement. Rechargez maintenant l'onglet dans lequel se trouve votre boîte de réception Roundcube.
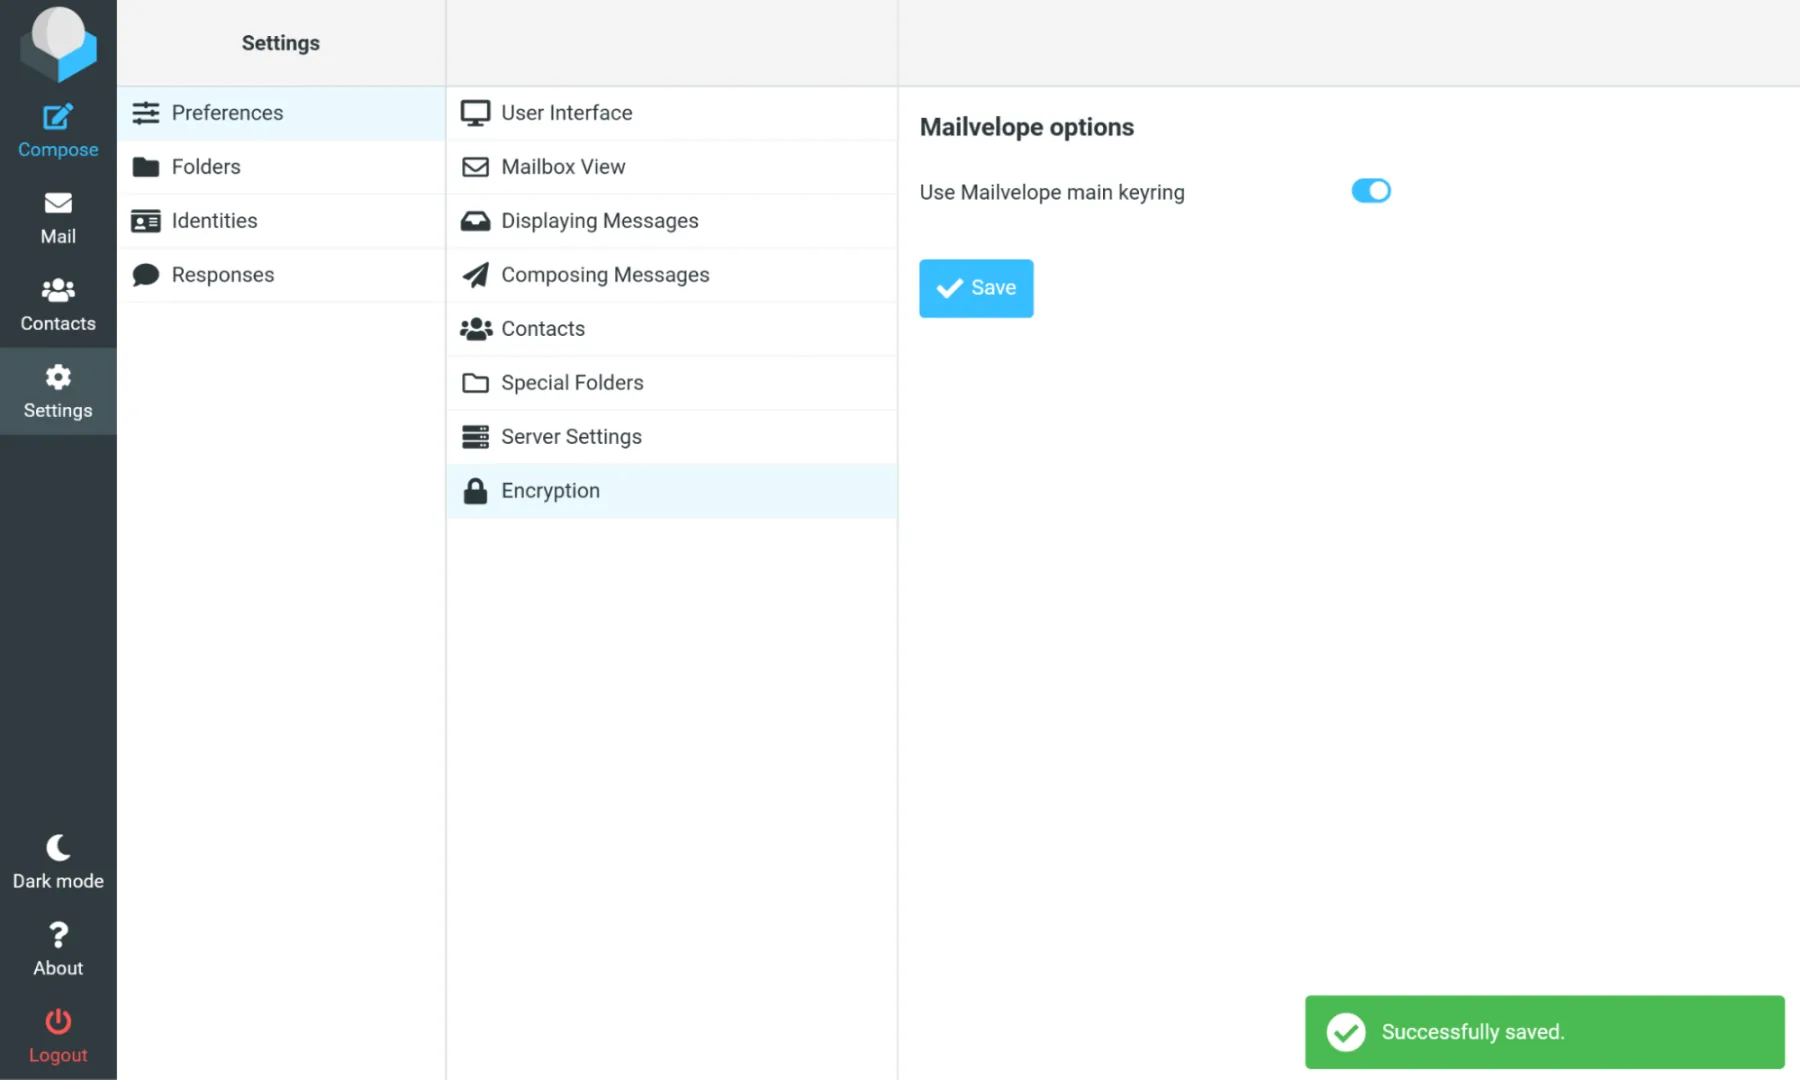
Dans Roundcube, accédez ensuite à Paramètres→Préférences→Chiffrement et activez le bouton à bascule Utiliser le porte-clés principal de Mailvelope des Options de Mailvelope.Mailvelope fonctionnera alors de manière transparente avec votre courriel Web Roundcube.
Envoyer un courriel chiffré avec Roundcube
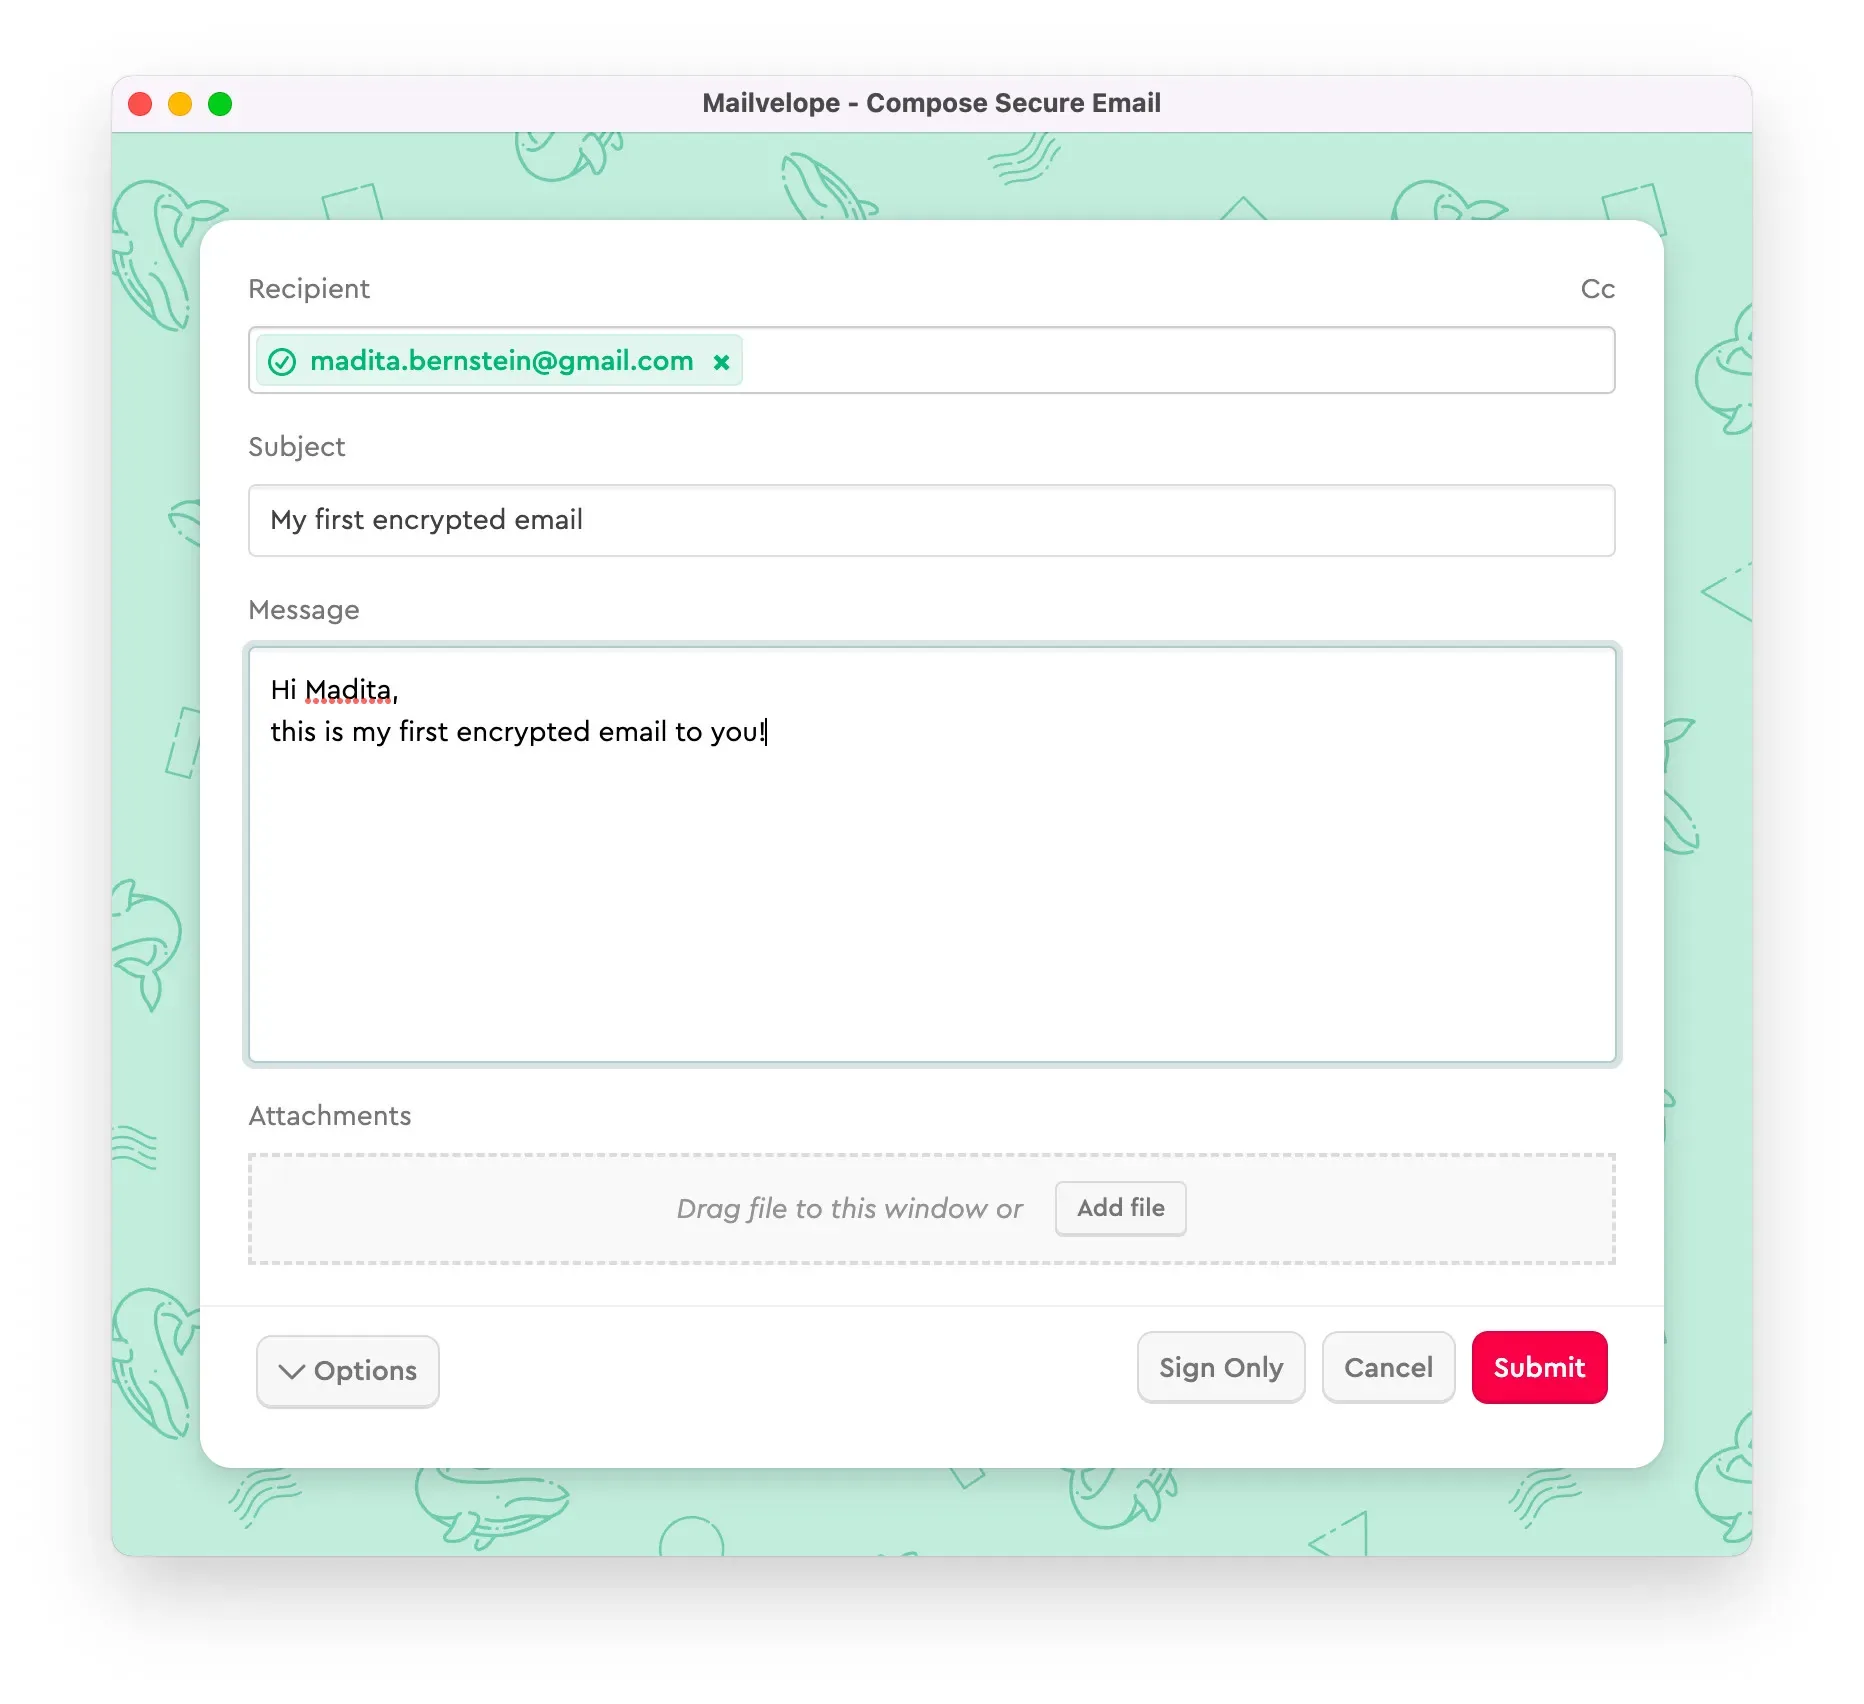
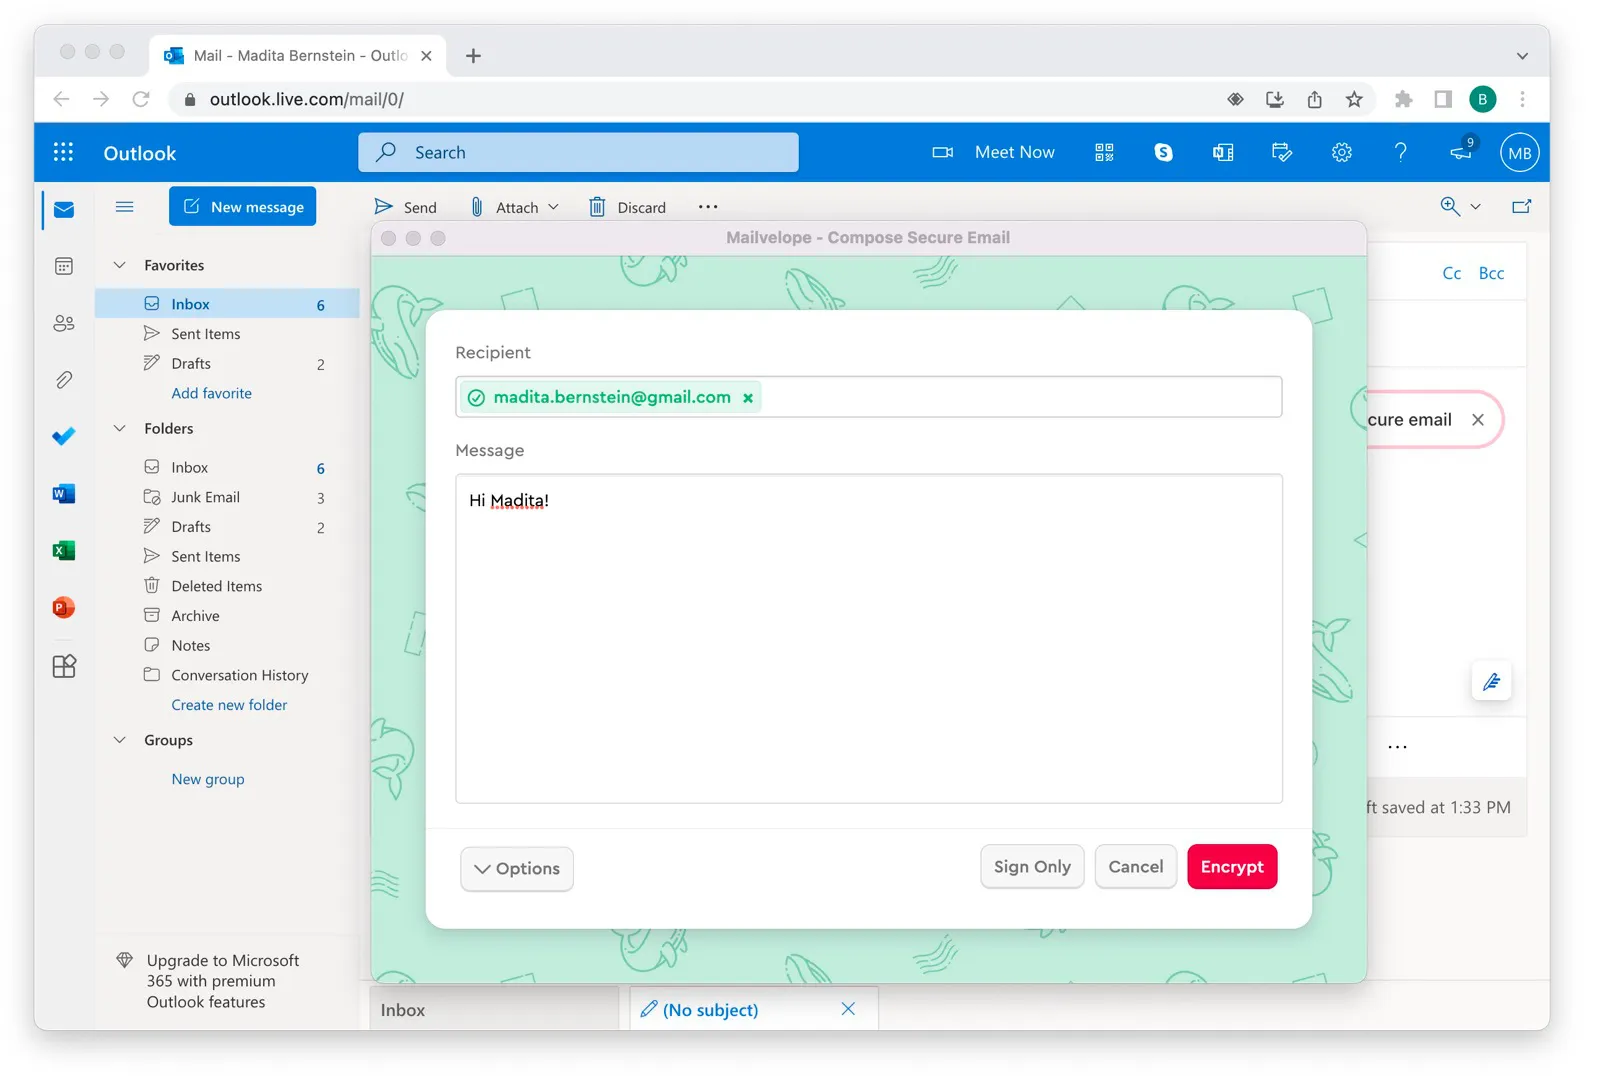
Après avoir installé Mailvelope, le bouton Chiffrement apparaît dans la barre supérieure de navigation. Vous pouvez choisir soit de Chiffrer soit de Chiffrer et signer votre courriel.Nous vous recommandons de choisir Chiffrer et signer, car cette option permet au ou à la destinataire de confirmer que vous avez envoyé le courriel.
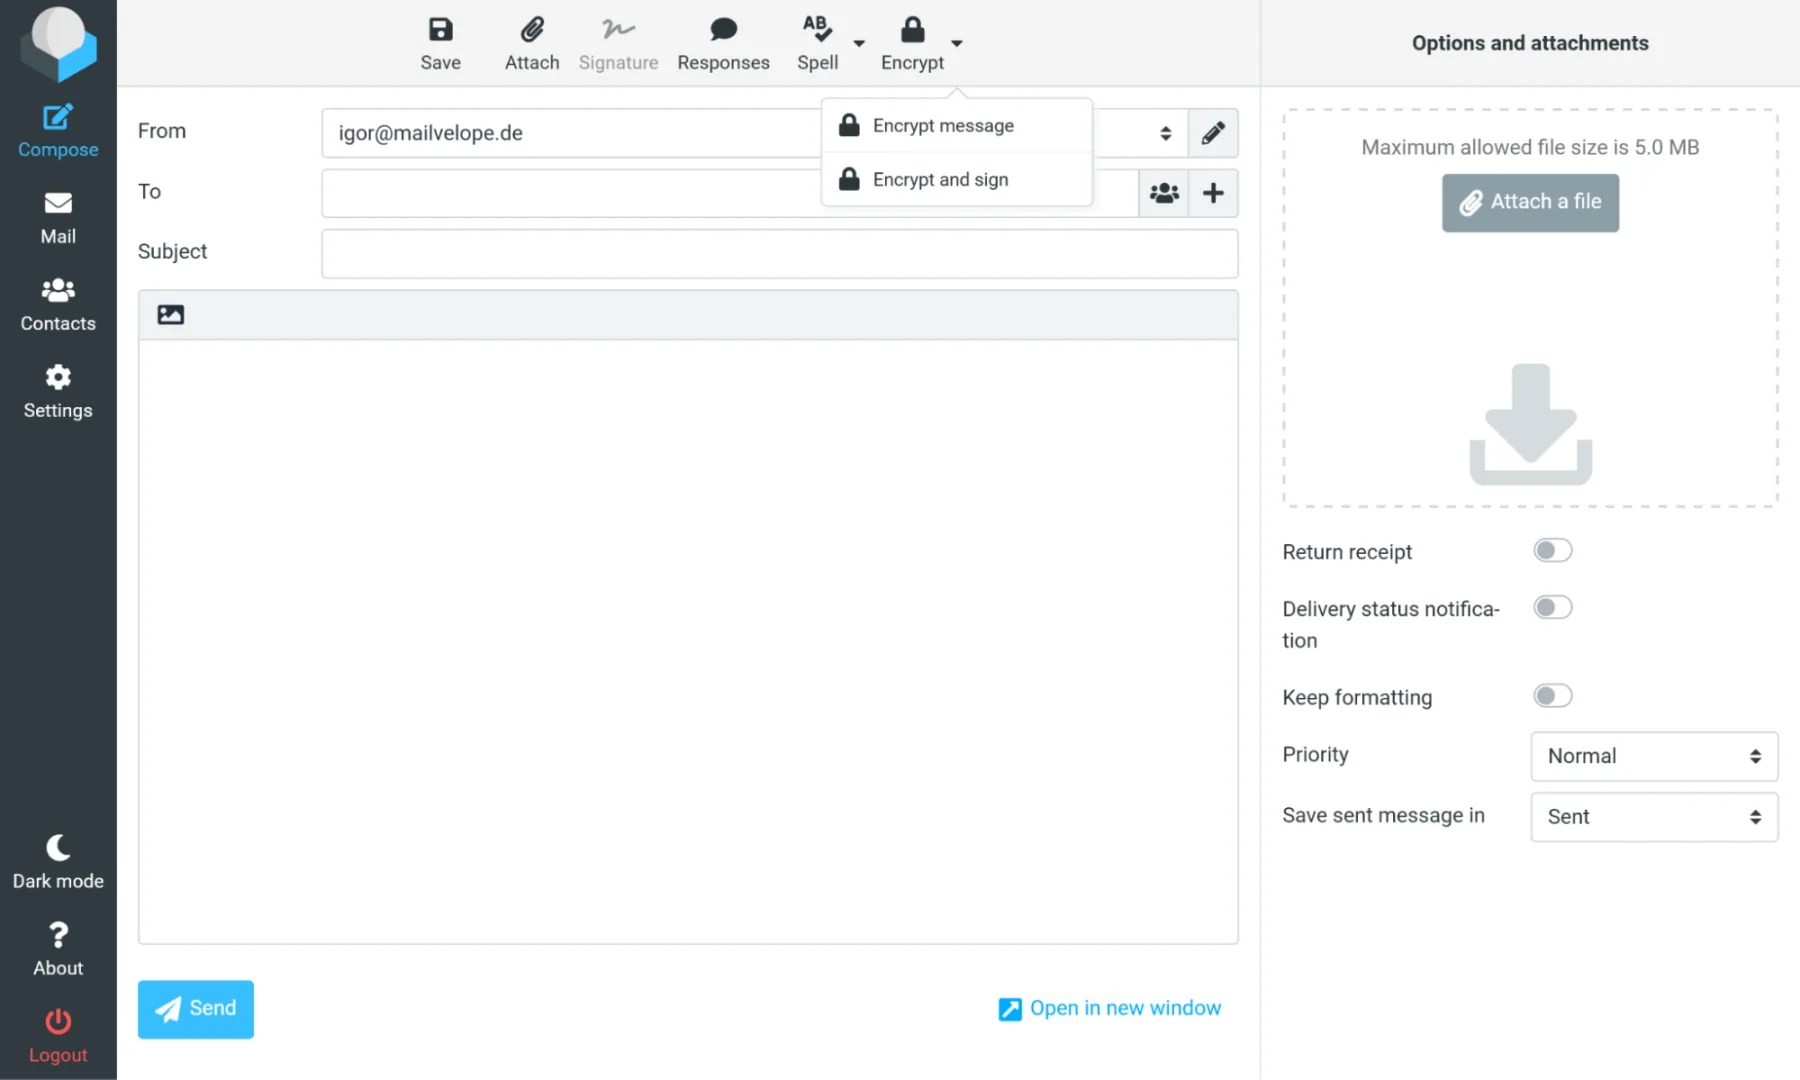
Note : Le bouton Chiffrer sera inactif si le type de courriel est réglé sur HTML, car le chiffrement n'est pris en charge que pour les courriels en texte brut. Pour définir le type de courriel sur Texte brut,cliquez sur le bouton X dans le coin supérieur gauche du champ de courriel, à côté des icônes de formation HTML dans la barre supérieure de votre éditeur Roundcube.
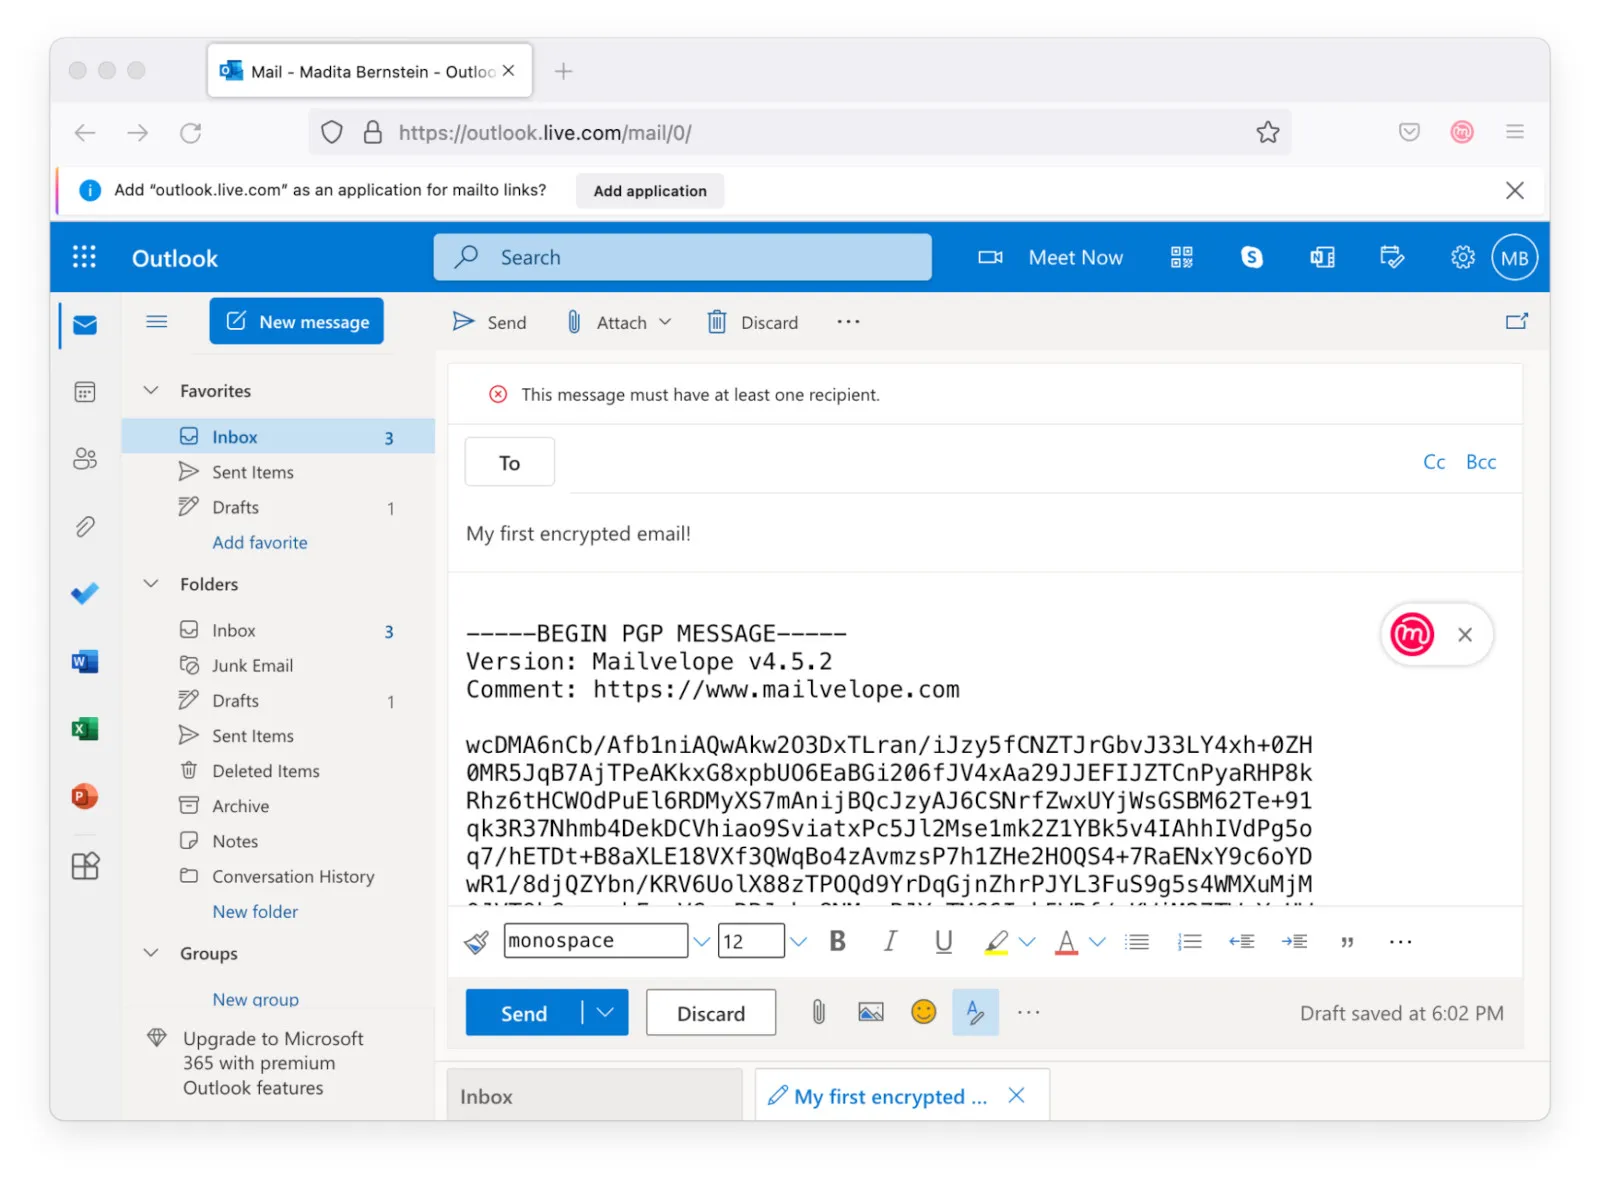
L'éditeur Mailvelope apparaît et vous pouvez commencer à saisir votre courriel.
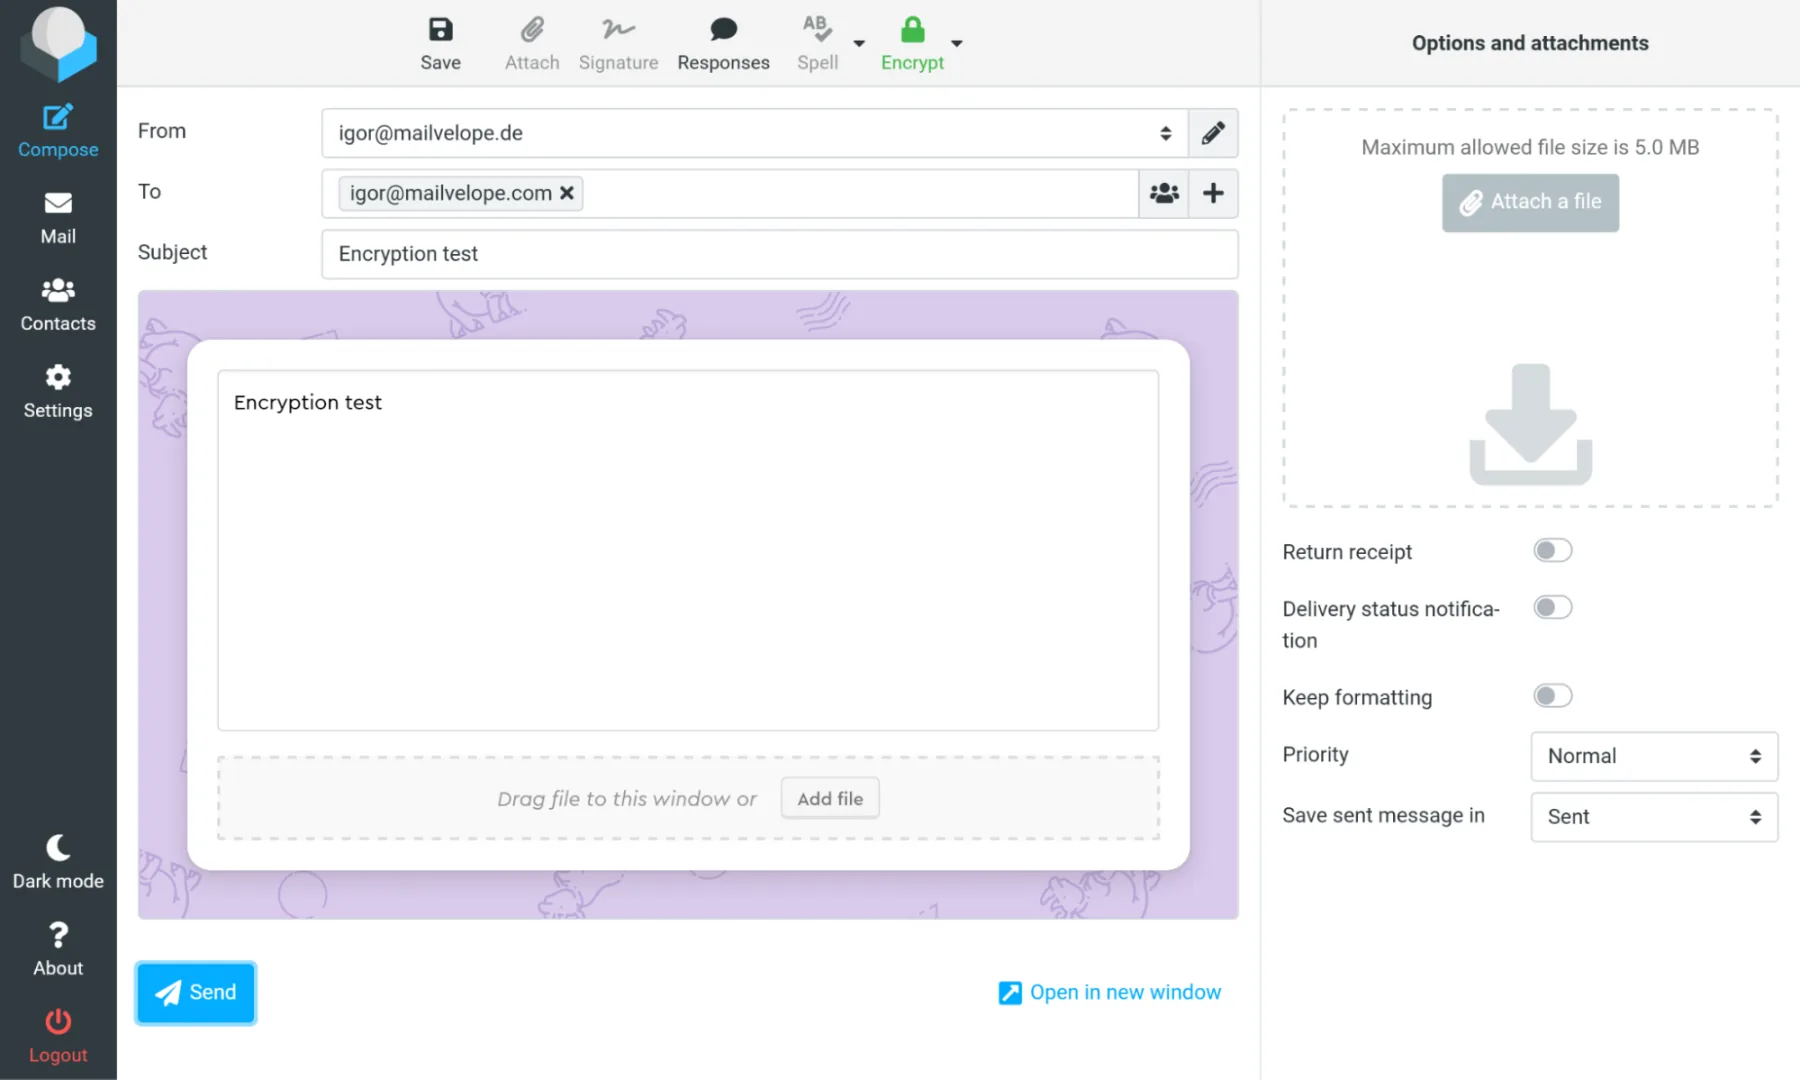
Vous pouvez ajouter des fichiers joints en cliquant sur Ajouter un fichier. Envoyez le courriel en cliquant sur le bouton Envoyer.
Note : N'utilisez pas la section « Options et fichiers joints » à droite pour envoyer des fichiers joints chiffrés.Utilisez toujours l'option Ajouter un fichier dans l'éditeur Mailvelope, sinon, vos fichiers joints ne seront pas chiffrés.
Déchiffrer un courriel qui vous a été envoyé
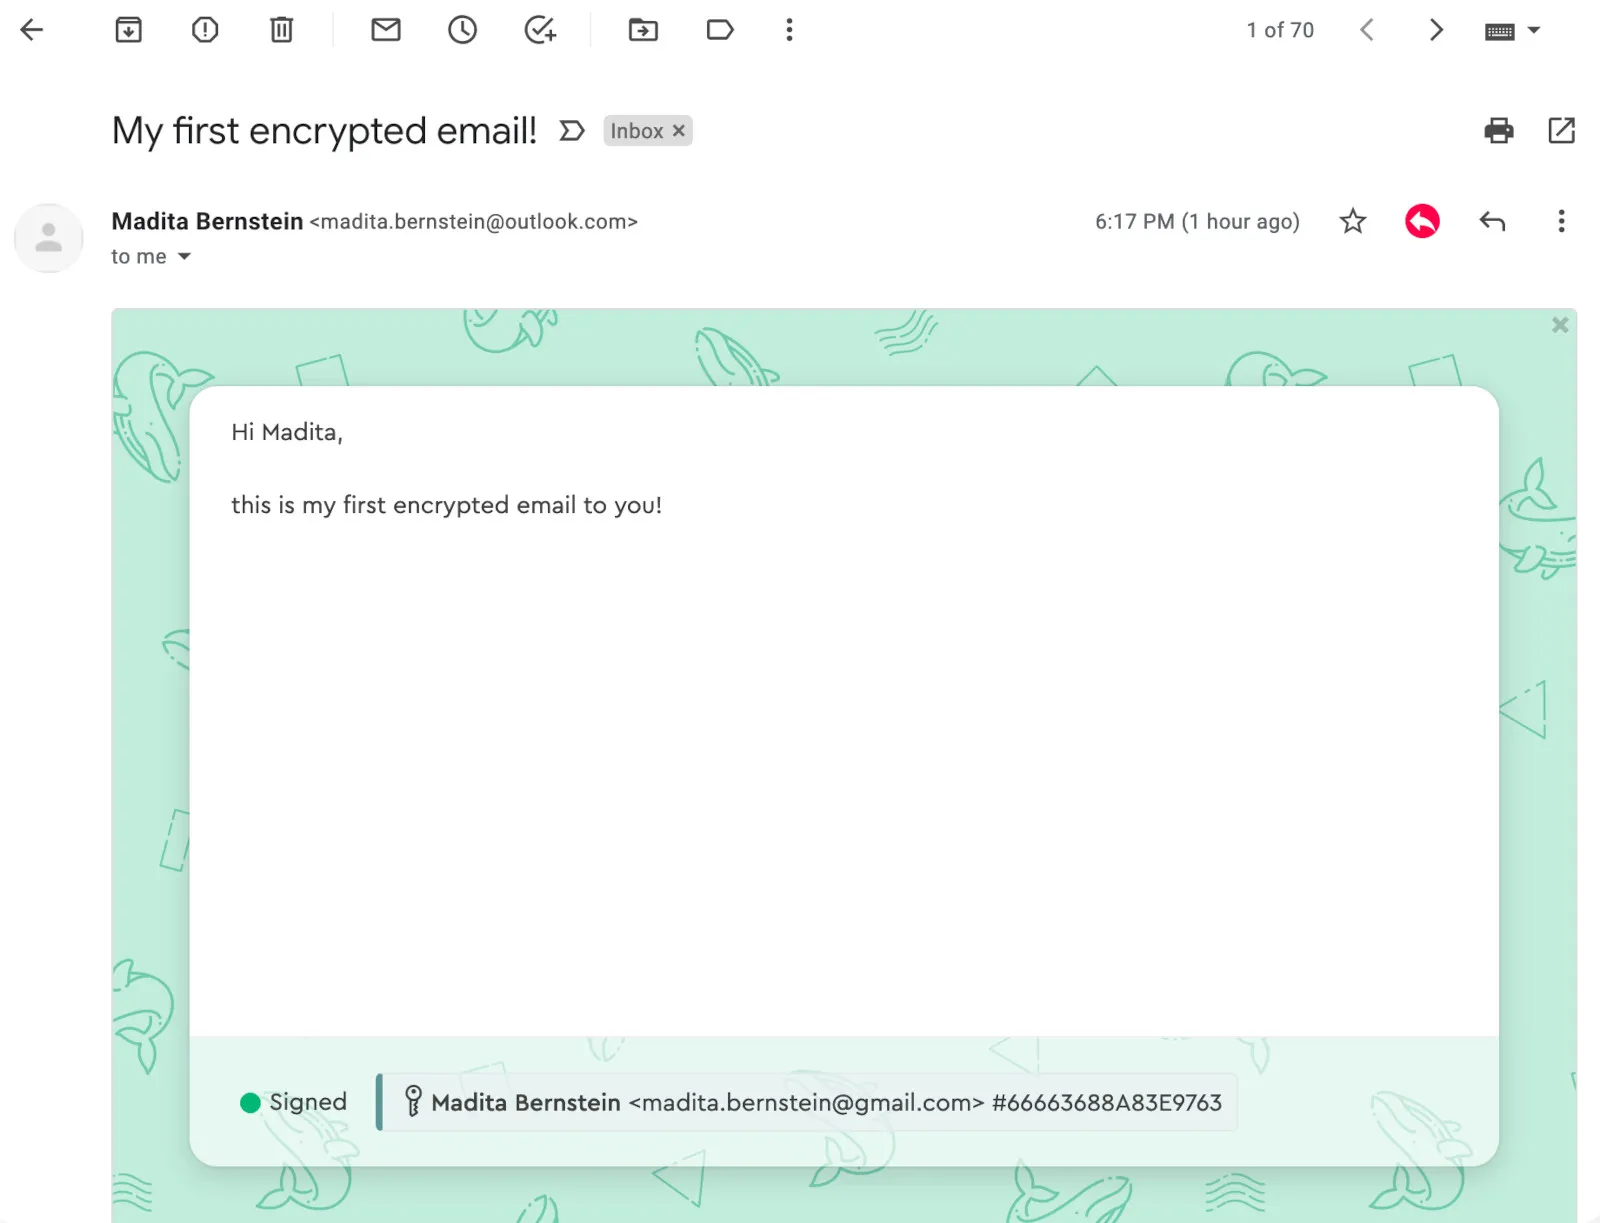
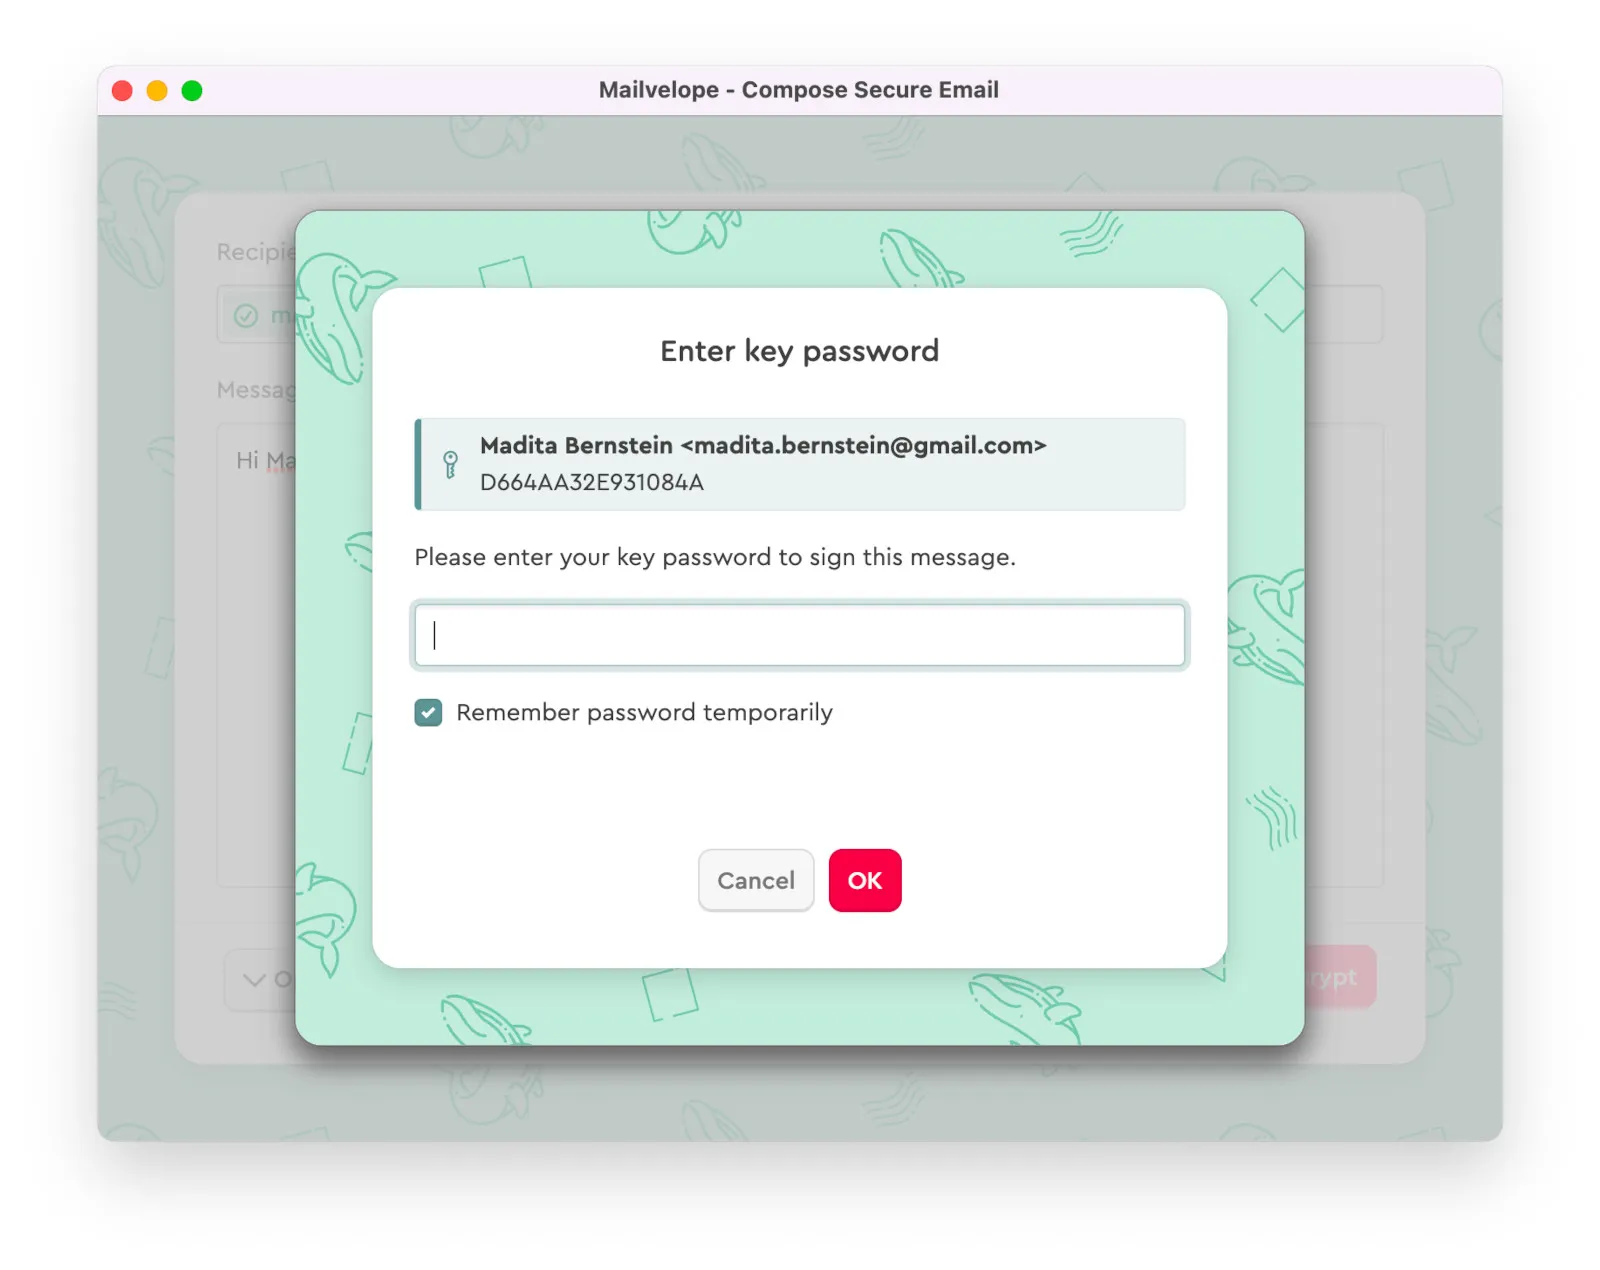
Si vous cliquez sur un courriel chiffré dans votre boîte de réception, Mailvelope vous le présente d'abord sous la forme d'une enveloppe scellée.En cliquant dessus, Saisir le mot de passe de la clé apparaît. Saisissez le mot de passe de votre clé privée et cliquez sur Valider pour déchiffrer et ouvrir le message.
Déchiffrer les fichiers joints
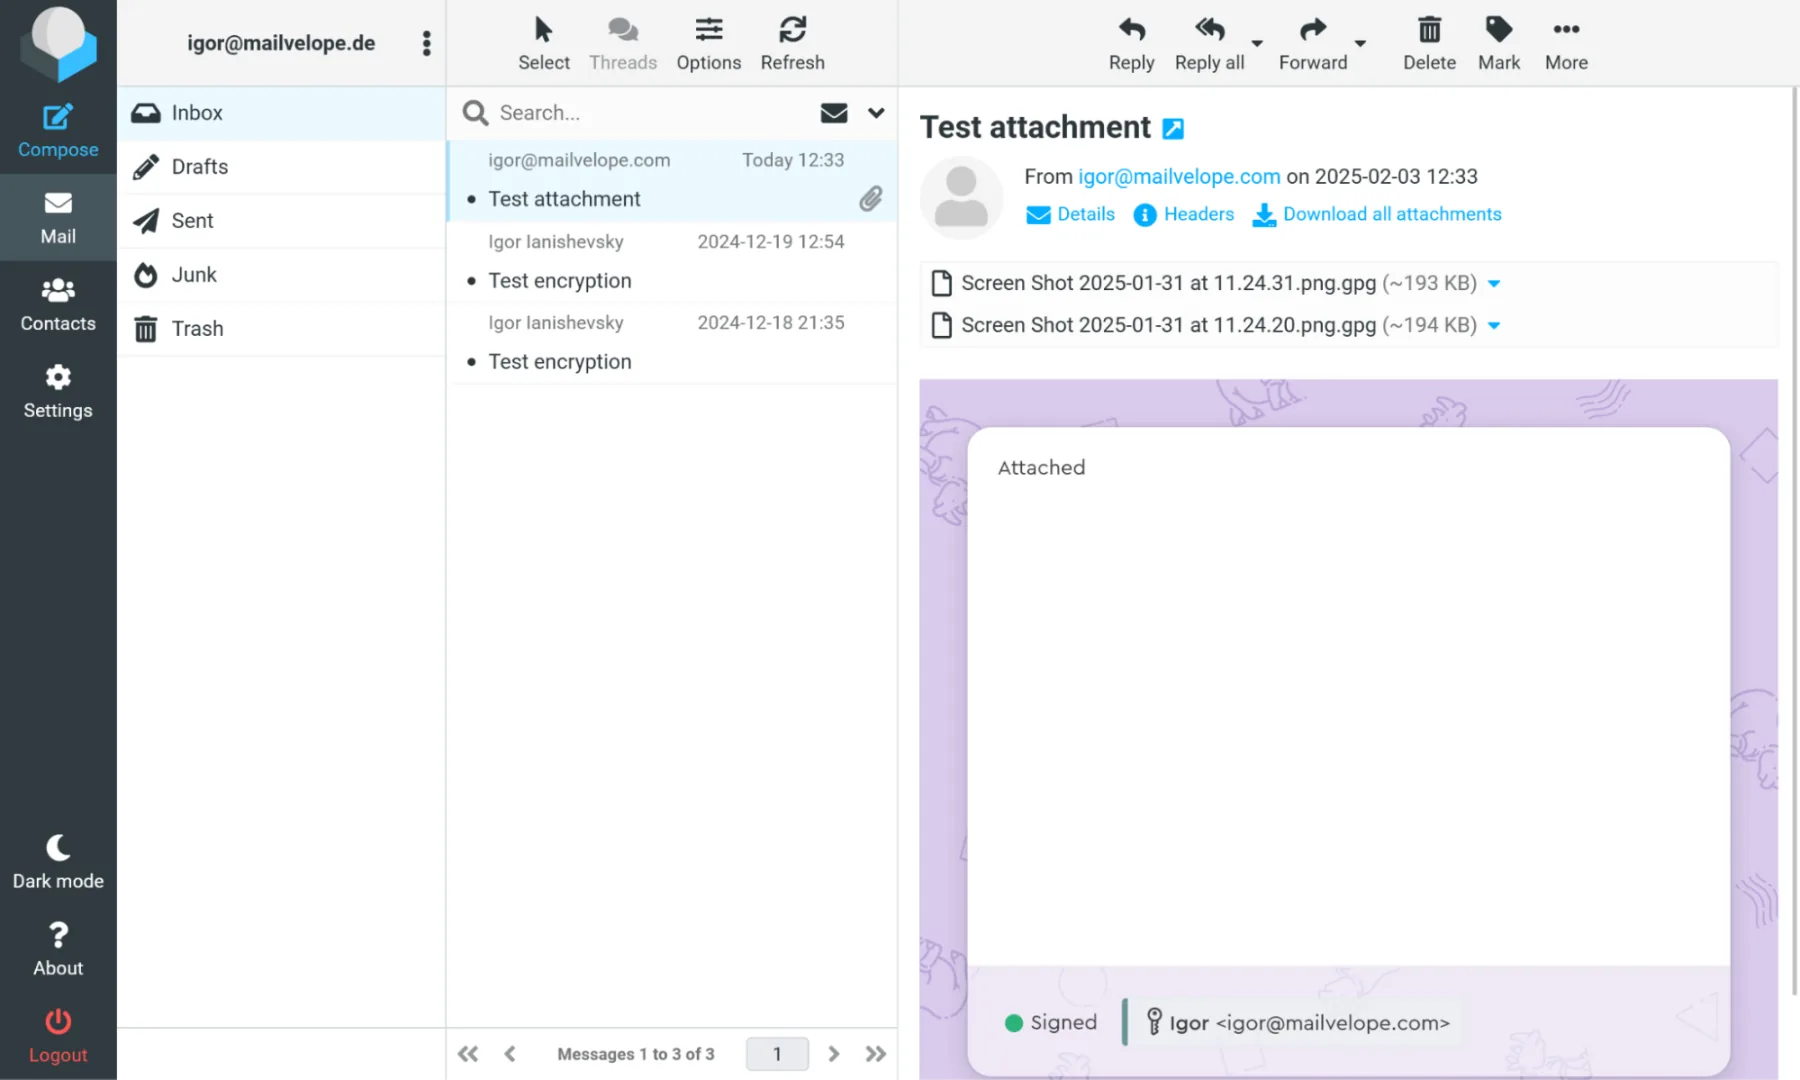
Si le courriel que vous avez reçu comprend un fichier joint chiffré (généralement avec une extension de fichier .gpg, comme le montre la capture d'écran ci-dessus),commencez par le télécharger. Cliquez ensuite sur l'icône de Mailvelope dans le coin supérieur droit de votre navigateur pour ouvrir le menu principal. Accédez au Tableau de bord et choisissez
Déchiffrer dans la barre de menu supérieure. Cliquez sur « Ajouter un fichier » ou glissez-déposez le fichier chiffré dans la fenêtre de Mailvelope. Après avoir saisi le mot de passe de votre clé privée,
vous pouvez télécharger les fichiers joints déchiffrés.

 Mailvelope pour Chrome de Google
 Mailvelope pour Firefox de Mozilla
 Mailvelope pour Edge de Microsoft